- Home
- Design Showcase
- The Plumbers Nightmare: A Mind-Bending 3D Print with Unexpected Result
Design Showcase
We are thrilled to have another project featuring the talented Canadian 3D modeler, DaveMakesStuff! Each month, Dave will be releasing a captivating project, pushing the boundaries of 3D printing and showcasing his remarkable skills. But here's the best part – you can join in on the fun! Throughout the series, Dave will provide downloadable files, allowing you to bring his creations to life right at home. To stay updated on the latest releases and follow along with Dave's journey, be sure to visit our blog and connect with us on social media. Get ready for an extraordinary 3D printing adventure with DaveMakesStuff!
The Plumbers Nightmare
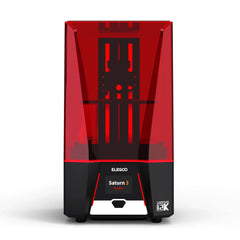
What do you call a random matrix of pipes leading nowhere? A nightmare! Dave's second project is exactly that: The Plumbers Nightmare, printed on the Elegoo Saturn 2. He created a matrix of randomly oriented hollow pipes, each following a random path to a different outlet, and each interconnected in some way. This was the perfect project to highlight the versatility and high printing accuracy of the Standard 8K Elegoo Resin.

What was used
- Elegoo Saturn 2 3D Printer
- ELEGOO 8k Standard Photopolymer
- Modeling Program: Onshape CAD Software
- - NTopology for adding wicker texture
The Process
To start off, Dave modeled the design of the pipes in OnShape, his preferred design software. In particular, he modeled one junction on pipes that allowed for 8 different configurations, depending on the position. He then took the units and plotted them into a 4x4x4 cell map. While plotting, he ensured that we could add random parts within each random selection of the cell map, giving the possibility of a truly random end result. He completed the model in Topology, exported it as an STL, and put it in Chitubox for preprocessing.
The setup of this print was quite deliberate. Dave could have used a less complicated setup since he was using resin. The challenge, however, was to push the limits to see how the resin worked while under pressure from the project demands, and it didn't disappoint!
Preparing to print
While setting up and preparing the design for print, Dave hit a snag. Tilting the cube at 45 degrees made the internal angles as uniform as possible, but the project had a lot of major overhangs that might give the printer a lot of trouble if not properly supported. Consequently, a lot of support was needed for the overhang pipes. To overcome this, Dave tried using auto-support (internal supports from the printer), but it gave the project unnecessary internal support which made it crash. Finally, he resorted to supporting the overhangs manually.
While using manual supports was a pretty good workaround to auto-support, the project still lacked overall stability, since some sections didn’t have adequate hold. To fix this, Dave decided to try his hands on building a raft to give overall part stability and this provided the balance needed to get it ready for print.
Printing
The Plumber's Nightmare is an intricate piece and took over 8 hours to print! Dave left it overnight and by morning, it was all done and successful. Now came the time to take it off the build-plate and clean it.
Cleaning and Curing
The SLA print was extremely easy to take off the buildplate. For Dave, this was quite a surprise since he comes from an FDM background. The same can’t be said of the cleaning process, though! A ton of resin came out from the supports and angles on the pipes, which made it difficult to clean.
To start with, Dave gave the project a quick rinse with the BASF cleaner to get off the excess resin followed by an IPA bath. This 2-step cleaning method ensured that it was properly cleaned with no residues. As an extra step, he used a turkey baster to clean out all the pipes since they were harder to reach. Once the cleaning was done, the print was left overnight to dry. By morning, he had a clean and clear finish.
Finally, to ensure that no resin was left uncured, Dave used a handheld UV light to cure the inside of the pipes.
Final Thoughts
Having learned from the first project, the 8K Benchy print, using the manual supports and adding the raft for general stability made it stable enough and the printing process went better than that of the Benchy. The project was also a fun one for Dave, and the Elegoo Saturn 2 made it an easy one. This, combined with the resin gave it amazing results.
We can’t wait to see what he makes next! Remember to check back next month to see Dave’s next project. You can explore the Plumbers Nightmare here.


