- Home
- Design Showcase
- The Ultimate Lattice Texture Print: Unveiling the 8K Benchy
Design Showcase
We are thrilled to announce the launch of an exciting new Design Collaboration Showcase featuring the talented Canadian 3D modeler, DaveMakesStuff. Each month, Dave will be releasing a captivating project, pushing the boundaries of 3D printing and showcasing his remarkable skills. But here's the best part – you can join in on the fun! Throughout the series, Dave will provide downloadable files, allowing you to bring his creations to life right at home. To stay updated on the latest releases and follow along with Dave's journey, be sure to visit our blog and connect with us on social media. Get ready for an extraordinary 3D printing adventure with DaveMakesStuff!
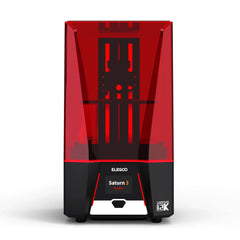
Today we’re going through his first project printed on the Elegoo Saturn 2: The wicker benchy. A unique take on a benchy that incorporates an organic look and feel. But why is he expanding on 3D printing’s most popular calibration print? To push the limits of Resin 3D printing to see how it differs from traditional FFF technologies. If you’re debating between Resin and Filament printers this project will provide valuable insights into their unique capabilities.

What Was Used
- - Elegoo Saturn 2 3D Printer
- - ELEGOO 8k Standard Photopolymer
- - Modeling Program: Onshape CAD Software
- - NTopology for adding wicker texture
Testing The Limits
When you get a new filament 3D printer, it's common to test its limits and make sure it's calibrated correctly. Many people choose to print a benchy, a boat model with tricky parts and intricate shapes that really push the printer's capabilities. In this case, even though Dave isn’t using an FDM printer, he wanted to give the Saturn 2 a challenge. So Dave decided to utilize the Benchy model but incorporate a wicker texture into the print. This would be difficult for a resin printer because of the gaps in the lattice, and it couldn't be done on an FDM printer at such a small scale. Dave also played around with the lattice joint widths to test if the printer would have any problems.
To ensure a clean print, the benchy was positioned upside down with supports coming from the top. Different support weights were tested to see how they affected the final model. This helped determine the effort needed to remove the supports and the size of divots they left on the print. This information is important when printing intricate or organic models, as it allows for better orientation choices to minimize supports and reduce divots on the front of the benchy, preserving its quality.
The Wash Process
Dave's first attempt at post-processing and curing a resin print proved to be a learning experience. The process began with a quick rinse using the BASF cleaner, followed by a second wash with IPA. This two-step cleaning method ensured that all the resin was effectively removed, especially from the tight points within the lattice structures of the benchy. The cleaning was done using the Elegoo cure and wash station, which facilitated the washing process. Thankfully, there were no issues with excess material remaining on the print, resulting in a clean and clear finish.
Insights and Conclusions
The benchy print could have benefitted from using smaller supports, as there were divots scattered throughout the model. However, the level of divots was acceptable for a first print attempt. The print itself was fantastic, showcasing remarkable detail without encountering any overhang or other issues commonly associated with FDM printing. This highlights one of the advantages of resin printing, as it overcomes the constraints faced in FDM printing. The use of 8K resolution has allowed Dave to explore highly intricate designs and expand the possibilities for his prints. We can’t wait to see what he makes next! Remember to check back next month to see Dave’s next project.
Looking to print a lattice inspired benchy of your own? You can get the file at Thangs3D
Quick Start

